All Products are in stock
and shipped from France.
Delivery within 48 hours.
and shipped from France.
Delivery within 48 hours.
Our categories
-
Special effect paints
- Chameleon effect paints
- Paint with an opalescent pearlescent sheen
- Prismatic Paints
- Candy Paints
- The fluorescent paints
- Phosphorescent paints
- Fluorescent paints UV
- Crystal Pearlescent Clearcoat
- Marble and crystal paint
- Paints that react to temperature
- Paints that react to light
- Magnetic paint and rust color
- Chrome effects
-
Our paint ranges for bodywork
-
PAINT KIT FOR CAR BODYWORK
-
CAR COLOUR CODE
- AIXAM car paint
- ALFA ROMEO car paint
- ASTON MARTIN car paint
- AUDI car paint
- BMC car paint
- BMW car paint
- BUGATTI car paint
- CADILLAC car paint
- CHEVROLET car paint
- CHRYSLER car paint
- CITROEN car paint
- DACIA car paint
- DAEWOO car paint
- DAIHATSU car paint
- DODGE car paint
- FERRARI car paint
- FIAT car paint
- FORD car paint
- GENERAL MOTORS car paint
- HONDA car paint
- HYUNDAI car paint
- ISUZU car paint
- IVECO car paint
- JAGUAR car paint
- JEEP car paint
- KIA car paint
- LADA car paint
- LAMBORGHINI car paint
- LANCIA car paint
- LAND ROVER car paint
- LEXUS car paint
- Lotus car paint
- MASERATI car paint
- MAZDA car paint
- MERCEDES car paint
- MG car paint
- MINI car paint
- MITSUBISHI car paint
- NISSAN car paint
- OPEL car paint
- PEUGEOT car paint
- PORSCHE car paint
- RENAULT car paint
- Rolls Royce car paint
- ROVER car paint
- Saab car paint
- SEAT car paint
- SKODA car paint
- SMART car paint
- SSANGYONG car paint
- SUBARU car paint
- SUZUKI car paint
- TOYOTA car paint
- Volkswagen car paint
- VOLVO car paint
- Primers for car paints
- Epoxy-polyester paint for wheel rim
- Spraypaint bodywork
- Metallic effect paints for car bodywork
- Tuning paints with effects
- Pearlescent paints for bodywork
- Solvent-based 1K base coats for cars
- 2K paints for cars
- Vintage cars paints
- Rustproof car frame paints
- Car underbodies and pick-up trucks paints
- Car cylinder block paints
- Dashboard paints
- Car brake paints
- Plastic bumper paints
- Car wing mirror paints
-
CAR COLOUR CODE
-
PAINT KIT FOR MOTORCYCLE BODYWORK
-
Motorcycle and scooter paint code - Can or spray paint
- APRILIA motorcycle paint
- BENELLI motorcycle paint
- BIMOTA motorcycle paint
- BMW motorcycle paint
- Buell motorcycle paint
- CAGIVA motorcycle paint
- DERBI motorcycle paint
- DUCATI motorcycle paint
- GILERA motorcycle paint
- HARLEY-DAVIDSON motorcycle paint
- HONDA motorcycle paint
- HUSQVARNA motorcycle paint
- INDIAN MOTORCYCLE PAINT
- KAWASAKI motorcycle paint
- KTM motorcycle paint
- KYMCO motorcycle paint
- LAMBRETTA motorcycle paint
- MALAGUTI motorcycle paint
- MBK motorcycle paint
- MORINI motorcycle paint
- GUZZI motorcycle paint
- MV AGUSTA motorcycle paint
- PEUGEOT motorcycle and scooter paint
- PIAGGIO motorcycle paint
- SACHS motorcycle paint
- SUZUKI motorcycle paint
- SYM motorcycle paint
- TRIUMPH motorcycle paint
- YAMAHA motorcycle paint
- Motorcycle tuning paints
- Motorcycle paint primers
- Motorcycle spray paints
- Epoxy paints for motorcycle frames
- Epoxy paints for motorcycle rims
- Metallic motorcycle paints
- Pearly motorcycle paints
- Motorcycle clearcoats
- The paints for plastic of cross country motorcycle
- Jet ski hull paints
- Paints for Quad
-
Motorcycle and scooter paint code - Can or spray paint
- Scooter fairing paints
- Helmet paints
- Auxiliary products
- Bicycle paints - Stardust Bike
- RAL Paint - Pantone Code
-
PAINT KIT FOR CAR BODYWORK
- Finish paints and topcoats
-
Artistic and custom specialties
- EPOXY RESINS
- Gilding with a gold leaf
- Pinstriping paint and brushes
- Hydrographic Film
- Covering car and motorcycle
- Pearls and Flakes bodywork
- Painting over the body
- Paint for fishing decoys
- Paints for guitars
- HIKARI : paints for models and miniatures
- Acrylic 3D Printing Paint – Primers, Colors, and Clearcoat
-
Bodywork accessories and consumables
- HVLP Spray Guns for car and motorcycle paints
- Our ranges of airbrushes
- Compressed air connections
- BODYWORK ACCESSORIES
- Abrasives for bodywork
- Buffing and polishing of bodywork
- Protective Equipment for painters
- POSTERS
- Paint air filters
- sample supports for paint tests
- Infrared and ultraviolet drying lamps for paint
- Bodywork adhesives and paint
- Air compressors for painting
- Paints for airbrush
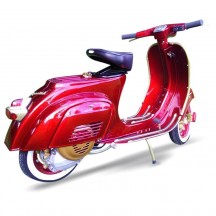
Scooter fairing paints
Paints of the same type as those used for vehicle bodies are used to paint scooters. In this category dedicated to scooter paints, we offer small quantity kits including only aerosol spray paints. For those interested in paint packed in cans (to apply with a spray gun), you must know that the same colours and effects in cans are available in car...
Read morePaints of the same type as those used for vehicle bodies are used to paint scooters. In this category dedicated to scooter paints, we offer small quantity kits including only aerosol spray paints. For those interested in paint packed in cans (to apply with a spray gun), you must know that the same colours and effects in cans are available in car paint, motorcycle paint, bike paint and scooter paint in full kits. Discover the various offers (each contains several different colours) below in this category.
We considered that, on the whole, users seldom have all the painter professional equipment, i.e. the spray gun, the air compressor, etc. Therefore, all of our complete kits consist of aerosol spray cans only.
The application method is similar in all respects to the other conventional repainting techniques, and each of our special effects is quite easy to achieve.
Scooter paint choices and techniques
Have you seen on our website a custom colour that you particularly like? Are you looking for a special shade that you saw in a catalogue or on the street? Please consult our technical expert, preferably by email, and send a picture of the model you want to obtain. We will explain what this product is, what quantities you need and what are the steps involved.
Scooters, whether modern or vintage, have shapes, curves and edges which are especially appropriate for bringing out the colour effects. In addition, the reduced area makes any effect accessible, even the most expensive.
Let yourself be tempted by an exceptional paint: candy, chameleon, or chrome.
What should I do before applying paint on a scooter?
First, it’s strongly recommended to disassemble all the parts to be able to paint them, rather than trying to hide and protect your entire scooter with adhesives, paper or plastic film.
The steps described in the Painting a scooter section are identical to that of a car and there are three stages for effect paints: The base for the background colour then the paint, and finally the topcoat
We recommend that you undertake these three steps in a single continuous process in order to achieve the best adhesion between each coat.
How much paint for a scooter?
The paint need and consumption differ depending on the effect chosen.
Do not worry, all our kits are designed to meet the needs and allow complete painting on a large scooter*
Painting your scooter yourself - Quick tips:
After dismantling, place the parts in an adequately ventilated room, choose a windless day to avoid dust, and wet the floor and the walls. Avoid painting at temperatures below 10 °C and above 30 °C.
Safety: Paints are harmful products. We stress the need for full respect of the safety instructions concerning their use and storage. In all cases, use the paints in the paint booth, or in a sufficiently well-ventilated place, and wear a filter cartridge mask.
DATA SHEETS (Diamond/Chameleon):
Please take the time to read through and understand our technical instructions, as they are the key to successful painting.
Preparation of the background on a scooter: Generally, it’s the fairing preparatory treatment, with light sanding (it is in no way stripping), and cleaning the dust, grease and other stains, to obtain a healthy surface, ready to be painted.
Repair: If there are deep scratches, or if adhesives have been removed, the surface should be smoothed by using a primer.
Application: The three stages are carried out in succession, with a maximum of 30-minute interval between each aerosol application. Why 30 minutes?
It’s a variable period of time depending on the air temperature. To avoid peeling, you must apply the coats on top of each other, before they dry completely on the surface!
Background paint (black or white): application in 2-3 quick passes, until full coverage. This means you need to apply quickly thin passes, as this is the best way to apply these paints. You imply wait one or two minutes between each coat.
Chameleon / Diamond Paints: Apply quickly 3-4 coats, moving the aerosol constantly, so as not to create saggings. The fine passes make it possible to proper position the pearls well flat.
Topcoat: On the contrary, the topcoat is applied in 2 thick and gloss coats, observing a 10-minute interval between the two coats.
This is a bodywork type clear coat: it resists perfectly to hydrocarbons.
Scooter paint color codes
Naturally, it is important to repair and make alterations in the event of a collision on the fairings with a paint registered among the scooter paint color codes of the brand in question. Even if an aluminum looks like another or a white looks like another white, well, there is a clear difference between each shade of each model or brand. Do you know your color code?
Types of scooter paint
To achieve a scooter finish, you need a whole series of products relating to scooter body paint. Indeed, the types of scooter paint are different from each other, each has its own role, its position in the succession of stages, its characteristics of use. We invite you to take a quick look at these bodywork products with us.
Paints of scooter parts
As is known, there are various parts on a scooter. Each part, each material has a particular use and the paints of the scooter parts must adapt to these constraints, these particularities. For example, coatings that are different from other parts of the fairings, for example, are used for the rims or for the areas of the engine. It's about having optimum strength and durability.
Minimize- Special Effect Paints
- Chrome Effect
-
Car and motorcycle paint
-
CAR COLOUR CODE
- AIXAM car paint
- ALFA ROMEO car paint
- ASTON MARTIN car paint
- AUDI car paint
- BMC car paint
- BMW car paint
- BUGATTI car paint
- CADILLAC car paint
- CHEVROLET car paint
- CHRYSLER car paint
- CITROEN car paint
- DACIA car paint
- DAEWOO car paint
- DAIHATSU car paint
- DODGE car paint
- FERRARI car paint
- FIAT car paint
- FORD car paint
- GENERAL MOTORS car paint
- HONDA car paint
- HYUNDAI car paint
- ISUZU car paint
- IVECO car paint
- JAGUAR car paint
- JEEP car paint
- KIA car paint
- LADA car paint
- LAMBORGHINI car paint
- LANCIA car paint
- LAND ROVER car paint
- LEXUS car paint
- Lotus car paint
- MASERATI car paint
- MAZDA car paint
- MERCEDES car paint
- MG car paint
- MINI car paint
- MITSUBISHI car paint
- NISSAN car paint
- OPEL car paint
- PEUGEOT car paint
- PORSCHE car paint
- RENAULT car paint
- Rolls Royce car paint
- ROVER car paint
- Saab car paint
- SEAT car paint
- SKODA car paint
- SMART car paint
- SSANGYONG car paint
- SUBARU car paint
- SUZUKI car paint
- TOYOTA car paint
- Volkswagen car paint
- VOLVO car paint
.
.
.
-
MOTO COLOUR CODE
- APRILIA motorcycle paint
- BENELLI motorcycle paint
- BIMOTA motorcycle paint
- BMW motorcycle paint
- Buell motorcycle paint
- CAGIVA motorcycle paint
- DERBI motorcycle paint
- DUCATI motorcycle paint
- GILERA motorcycle paint
- HARLEY-DAVIDSON motorcycle paint
- HONDA motorcycle paint
- HUSQVARNA motorcycle paint
- INDIAN MOTORCYCLE PAINT
- KAWASAKI motorcycle paint
- KTM motorcycle paint
- KYMCO motorcycle paint
- LAMBRETTA motorcycle paint
- MALAGUTI motorcycle paint
- MBK motorcycle paint
- MORINI motorcycle paint
- GUZZI motorcycle paint
- MV AGUSTA motorcycle paint
- PEUGEOT motorcycle and scooter paint
- PIAGGIO motorcycle paint
- SACHS motorcycle paint
- SUZUKI motorcycle paint
- SYM motorcycle paint
- TRIUMPH motorcycle paint
- YAMAHA motorcycle paint

.
.

-
CAR COLOUR CODE
- Finish Paints and Topcoats
-
Specialties

-
Accessories and consumables
.
.
- AIRBRUSH PAINT
- COLORCHART
