All Products are in stock
and shipped from France.
Delivery within 48 hours.
and shipped from France.
Delivery within 48 hours.
Our categories
-
Special effect paints
- Chameleon effect paints
- Paint with an opalescent pearlescent sheen
- Prismatic Paints
- Candy Paints
- The fluorescent paints
- Phosphorescent paints
- Fluorescent paints UV
- Crystal Pearlescent Clearcoat
- Marble and crystal paint
- Paints that react to temperature
- Paints that react to light
- Magnetic paint and rust color
- Chrome effects
-
Our paint ranges for bodywork
-
PAINT KIT FOR CAR BODYWORK
-
CAR COLOUR CODE
- AIXAM car paint
- ALFA ROMEO car paint
- ASTON MARTIN car paint
- AUDI car paint
- BMC car paint
- BMW car paint
- BUGATTI car paint
- CADILLAC car paint
- CHEVROLET car paint
- CHRYSLER car paint
- CITROEN car paint
- DACIA car paint
- DAEWOO car paint
- DAIHATSU car paint
- DODGE car paint
- FERRARI car paint
- FIAT car paint
- FORD car paint
- GENERAL MOTORS car paint
- HONDA car paint
- HYUNDAI car paint
- ISUZU car paint
- IVECO car paint
- JAGUAR car paint
- JEEP car paint
- KIA car paint
- LADA car paint
- LAMBORGHINI car paint
- LANCIA car paint
- LAND ROVER car paint
- LEXUS car paint
- Lotus car paint
- MASERATI car paint
- MAZDA car paint
- MERCEDES car paint
- MG car paint
- MINI car paint
- MITSUBISHI car paint
- NISSAN car paint
- OPEL car paint
- PEUGEOT car paint
- PORSCHE car paint
- RENAULT car paint
- Rolls Royce car paint
- ROVER car paint
- Saab car paint
- SEAT car paint
- SKODA car paint
- SMART car paint
- SSANGYONG car paint
- SUBARU car paint
- SUZUKI car paint
- TOYOTA car paint
- Volkswagen car paint
- VOLVO car paint
- Primers for car paints
- Epoxy-polyester paint for wheel rim
- Spraypaint bodywork
- Metallic effect paints for car bodywork
- Tuning paints with effects
- Pearlescent paints for bodywork
- Solvent-based 1K base coats for cars
- 2K paints for cars
- Vintage cars paints
- Rustproof car frame paints
- Car underbodies and pick-up trucks paints
- Car cylinder block paints
- Dashboard paints
- Car brake paints
- Plastic bumper paints
- Car wing mirror paints
-
CAR COLOUR CODE
-
PAINT KIT FOR MOTORCYCLE BODYWORK
-
Motorcycle and scooter paint code - Can or spray paint
- APRILIA motorcycle paint
- BENELLI motorcycle paint
- BIMOTA motorcycle paint
- BMW motorcycle paint
- Buell motorcycle paint
- CAGIVA motorcycle paint
- DERBI motorcycle paint
- DUCATI motorcycle paint
- GILERA motorcycle paint
- HARLEY-DAVIDSON motorcycle paint
- HONDA motorcycle paint
- HUSQVARNA motorcycle paint
- INDIAN MOTORCYCLE PAINT
- KAWASAKI motorcycle paint
- KTM motorcycle paint
- KYMCO motorcycle paint
- LAMBRETTA motorcycle paint
- MALAGUTI motorcycle paint
- MBK motorcycle paint
- MORINI motorcycle paint
- GUZZI motorcycle paint
- MV AGUSTA motorcycle paint
- PEUGEOT motorcycle and scooter paint
- PIAGGIO motorcycle paint
- SACHS motorcycle paint
- SUZUKI motorcycle paint
- SYM motorcycle paint
- TRIUMPH motorcycle paint
- YAMAHA motorcycle paint
- Motorcycle tuning paints
- Motorcycle paint primers
- Motorcycle spray paints
- Epoxy paints for motorcycle frames
- Epoxy paints for motorcycle rims
- Metallic motorcycle paints
- Pearly motorcycle paints
- Motorcycle clearcoats
- The paints for plastic of cross country motorcycle
- Jet ski hull paints
- Paints for Quad
-
Motorcycle and scooter paint code - Can or spray paint
- Scooter fairing paints
- Helmet paints
- Auxiliary products
- Bicycle paints - Stardust Bike
- RAL Paint - Pantone Code
-
PAINT KIT FOR CAR BODYWORK
- Finish paints and topcoats
-
Artistic and custom specialties
- EPOXY RESINS
- Gilding with a gold leaf
- Pinstriping paint and brushes
- Hydrographic Film
- Covering car and motorcycle
- Pearls and Flakes bodywork
- Painting over the body
- Paint for fishing decoys
- Paints for guitars
- HIKARI : paints for models and miniatures
- Acrylic 3D Printing Paint – Primers, Colors, and Clearcoat
-
Bodywork accessories and consumables
- HVLP Spray Guns for car and motorcycle paints
- Our ranges of airbrushes
- Compressed air connections
- BODYWORK ACCESSORIES
- Abrasives for bodywork
- Buffing and polishing of bodywork
- Protective Equipment for painters
- POSTERS
- Paint air filters
- sample supports for paint tests
- Infrared and ultraviolet drying lamps for paint
- Bodywork adhesives and paint
- Air compressors for painting
- Paints for airbrush
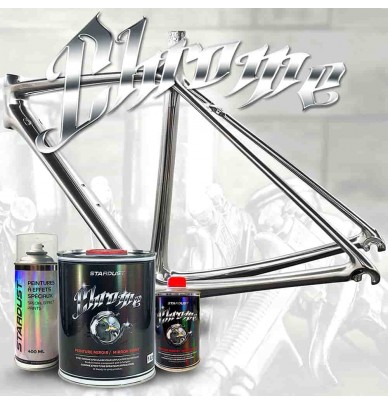
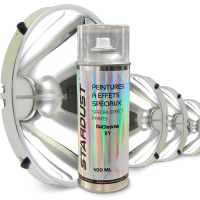
Chrome effect paint for bikes - complete kit in your choice of colors - STARDUST BIKE
New product
Canned paint kit for spray gun only
The chrome effect for bikes is delivered in silver color by default
The chrome can be colored as desired with the topcoat
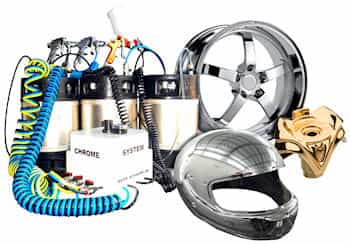
The chrome look is achievable on a bike with chrome paint. It is a unique liquid paint, based on perfect aluminum particles, which produces a mirror effect if applied over a special undercoat.
The technique can be done with a spray gun only, and is impossible with spray cans. It is a special process, accessible to everyone with respect to difficulty, as long as the application instructions are followed carefully.
We offer the colored chrome finish as an option, with a choice of about ten transparent colors
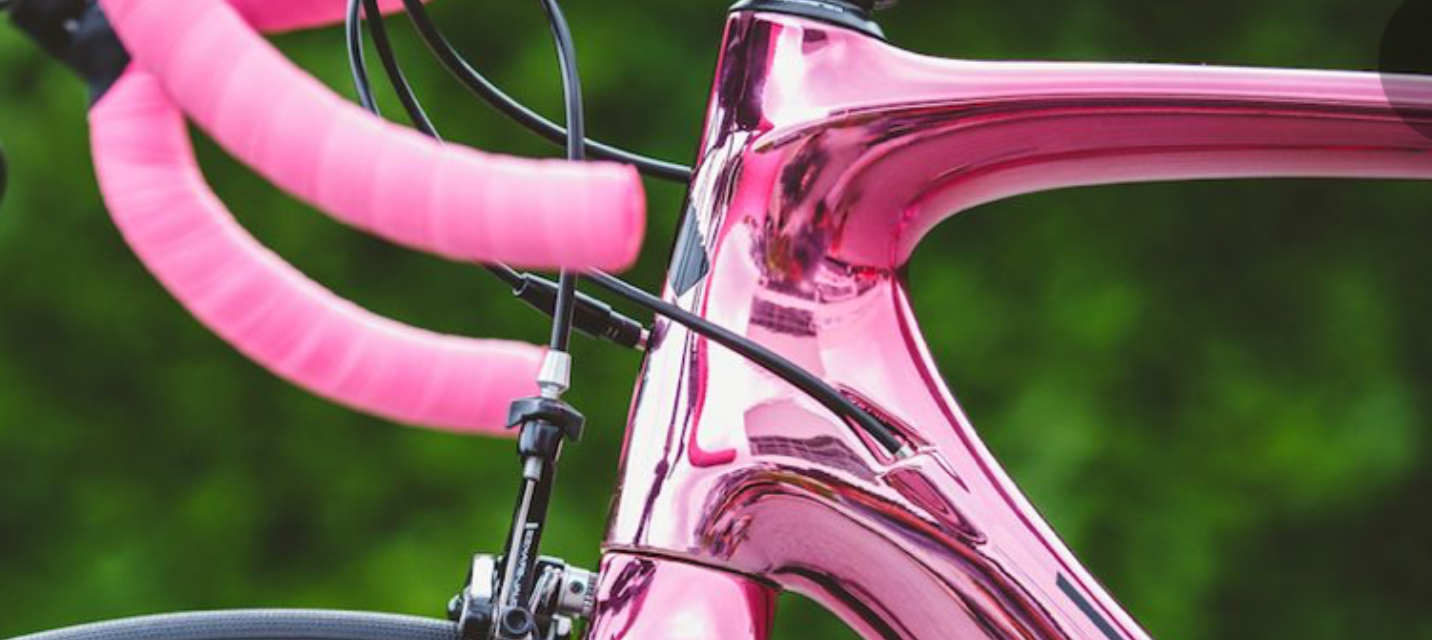
Check out here our tutorial on “How to paint a bike”
Warning : the chrome bike paint process, gives a very nice aesthetic aspect, but has a greater fragility, especially to impacts, which can lead to peeling. A trick is revealed below in this page, to ensure a higher grip power.
Summary description of the technique in 4 steps :
1 - Black primer, complete drying, then sanding
2 - application of a glossy and ultra-hard base coat (varnish), then drying 48h minimum
3 - application of chrome paint, then drying for 48 hours minimum
4 - application of the varnish
Offer details :
|
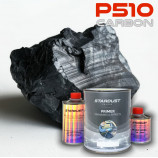
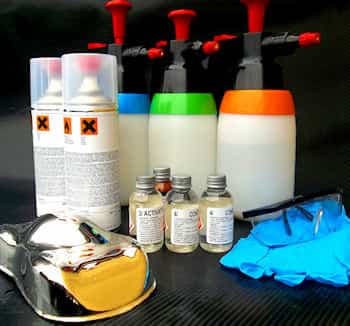
- P410 Primer kit BLACK 750 ml (500ml + 125ml hardener H400 + 125ml thinner V1) - 250 ml chrome paint - 1 Litre ceramic varnish kit (500 ml varnish ST8900X + 500 ml hardener) - 69 ml of Candy color of your choice * The kit includes enough to paint a complete bike (frame, fork and rims) * for the chrome color option |
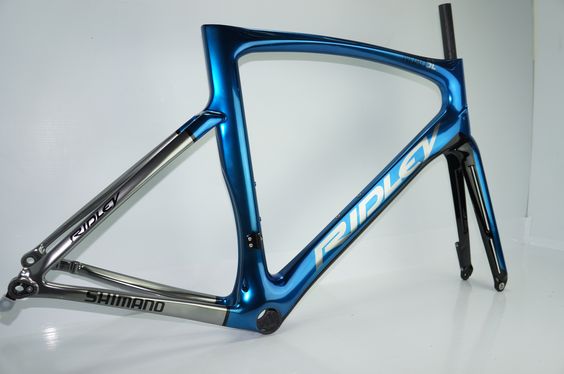
Detailed application procedure :
Degrease and sand the bike frame with a 320 grit sandpaper. Do not strip !
Step 1 : Apply black primer
Mix the primer according to weight or volume
with 4 parts primer, 1 part hardener, 1 part thinner
Apply 2 to 4 coats at 5 minute intervals, depending on surface condition. If the surface is smooth, two thin coats are sufficient.
After drying for 6 hours, sand the surface with water using 320 and 500 grit paper.
Potlife : 60 min
Step 2 : Apply the varnish base
The varnish on the black primer will create the necessary conditions to reveal the chrome effect : the more shiny and hard the background, the better the mirror will be (and vice versa). For this purpose the ceramic varnish is used to give the best results.
Mix the varnish, by weight: 100 parts + 100 parts. No dilution
Apply two glossy coats at 10 minute intervals.
Allow to harden as long as possible : minimum 48h.
Can be handled after 90 min.
Potlife : 20 min
Step 3 : The chrome paint
On the varnished, shiny and hard surface, it is only allowed to dust, with a microfiber or a soft cloth. You can also do a flaming*.
The chrome paint is ready to use : it is applied in ultra-thin layers, leaving just enough time for evaporation between each layer. It is during the evaporation phase that the chrome effect appears. Apply several coats until the black background is covered.
It is recommended to wait at least 24 to 48 hours before proceeding to the final step of varnishing, which is also the crucial step for the success of the chrome finish on the bike.
Step 4 : Varnish :
Without varnish, chrome paint is not resistant to oxidation or abrasion. It is therefore necessary to protect it with a varnish, however it should be noted that the varnish, if not done in a certain way, will disappear the mirror effect.
The ceramic varnish and its hardener in a can, are mixed in equal parts 1 : 1, without dilution. The mixture must be used quickly (20 min)
The application is done in 2 glossy coats, spaced about 5-10 minutes apart, after having fixed the surface : To fix the surface, we will spray about 4 dry super coats at a distance of 30 cm, and with 2 minutes of delay between each coat.
The varnish will be dry in 2 hours.
Chrome color :
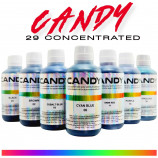
It is possible to choose the colored chrome option, and select the shade of your choice among our Candy colors here. Colors to be notified by email after order.
A 69 ml bottle of concentrated ink is provided to tint the varnish. The ink is dosed between 2% (for the yellow and black shades) and 4% (for the other shades)
Stickers
The application of adhesive can be done directly on the chrome paint.
If you want to apply and remove adhesive masking, it must be done on the varnished chrome paint, with precautions to avoid any peeling.
* Flaming : How to avoid the risk of peeling and promote maximum adhesion between coats ?
This is the only technique known to create a good level of adhesion on a glossy unsanded background. It consists of passing a flame with a torch / blowtorch, quickly on the surface of the paint, in a back and forth.
Flaming can therefore be done on the undercoat varnish before chrome plating, and also on the chrome effect paint before varnishing.
Question:
Do you have any advice once the chrome has been applied before applying the red tinted varnish? Do you recommend flaming or is there a safer technique?
Reply :
flaming is not a risky technique, and that's a good thing
for hanging, and to varnish more easily,
however this remains optional
and this is not going to replace the most important:
> The longest possible drying of the chrome paint
> The special varnishing technique
these two points are essential to maintain the mirror effect after varnishing
Find here our different complete CHROME paint kits:
► Car Kit
► Motorcycle Kit
15 other products in the same category
WE ALSO RECOMMEND YOU
Recently Viewed
- Special Effect Paints
- Chrome Effect
-
Car and motorcycle paint
-
CAR COLOUR CODE
- AIXAM car paint
- ALFA ROMEO car paint
- ASTON MARTIN car paint
- AUDI car paint
- BMC car paint
- BMW car paint
- BUGATTI car paint
- CADILLAC car paint
- CHEVROLET car paint
- CHRYSLER car paint
- CITROEN car paint
- DACIA car paint
- DAEWOO car paint
- DAIHATSU car paint
- DODGE car paint
- FERRARI car paint
- FIAT car paint
- FORD car paint
- GENERAL MOTORS car paint
- HONDA car paint
- HYUNDAI car paint
- ISUZU car paint
- IVECO car paint
- JAGUAR car paint
- JEEP car paint
- KIA car paint
- LADA car paint
- LAMBORGHINI car paint
- LANCIA car paint
- LAND ROVER car paint
- LEXUS car paint
- Lotus car paint
- MASERATI car paint
- MAZDA car paint
- MERCEDES car paint
- MG car paint
- MINI car paint
- MITSUBISHI car paint
- NISSAN car paint
- OPEL car paint
- PEUGEOT car paint
- PORSCHE car paint
- RENAULT car paint
- Rolls Royce car paint
- ROVER car paint
- Saab car paint
- SEAT car paint
- SKODA car paint
- SMART car paint
- SSANGYONG car paint
- SUBARU car paint
- SUZUKI car paint
- TOYOTA car paint
- Volkswagen car paint
- VOLVO car paint
.
.
.
-
MOTO COLOUR CODE
- APRILIA motorcycle paint
- BENELLI motorcycle paint
- BIMOTA motorcycle paint
- BMW motorcycle paint
- Buell motorcycle paint
- CAGIVA motorcycle paint
- DERBI motorcycle paint
- DUCATI motorcycle paint
- GILERA motorcycle paint
- HARLEY-DAVIDSON motorcycle paint
- HONDA motorcycle paint
- HUSQVARNA motorcycle paint
- INDIAN MOTORCYCLE PAINT
- KAWASAKI motorcycle paint
- KTM motorcycle paint
- KYMCO motorcycle paint
- LAMBRETTA motorcycle paint
- MALAGUTI motorcycle paint
- MBK motorcycle paint
- MORINI motorcycle paint
- GUZZI motorcycle paint
- MV AGUSTA motorcycle paint
- PEUGEOT motorcycle and scooter paint
- PIAGGIO motorcycle paint
- SACHS motorcycle paint
- SUZUKI motorcycle paint
- SYM motorcycle paint
- TRIUMPH motorcycle paint
- YAMAHA motorcycle paint

.
.

-
CAR COLOUR CODE
- Finish Paints and Topcoats
-
Specialties

-
Accessories and consumables
.
.
- AIRBRUSH PAINT
- COLORCHART
