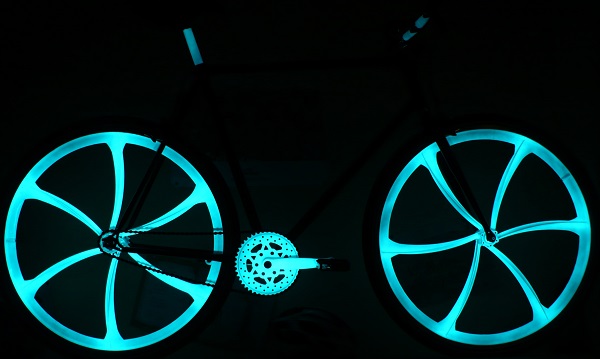
So, you want to give your bike a facelift? Or just adopt a stunning new look with a painting straight from the year 2100? Well to your bike spray paint or spray gun, for those who are lucky enough to be equipped! We will show you here the nice or just extraordinary possibilities that exist today in terms of bike paint with special effects !
Our team decided to dedicate a series of demonstration videos with a painter in the cabin, to see below, showing each technique of making a special bicycle painting. This article will therefore grow gradually.
- Chrome effect video
- Rainbow effect video
- Chameleon effect video
- Candy effect video
- Video phosphorescent effect
Know that there is something for everyone at Stardust, for every inspiration, from sober, chic and classic finishes, through the effects of chrome or polished metal, pearlescent colors or Candy, or changes of color called either “chameleons” or “holographic”, or fluorescent or phosphorescent paints … We will ignore some much crazier effects.
> Click here to discover all the bike paints available !
 Apply bike paint : the basics and preparations before attacking
Only one question: what is the state and nature of the support? Here is the question to ask yourself in order to get off to a good start. Is it carbon, aluminum, plastic, steel? Or is it just original paint or varnish?
Indeed, there is no need to embark on a stripping or the application of primer in the latter case: a simple light sanding is enough to create the grip. In short, we have made available a complete article on the subject of primers and primers, check it out!
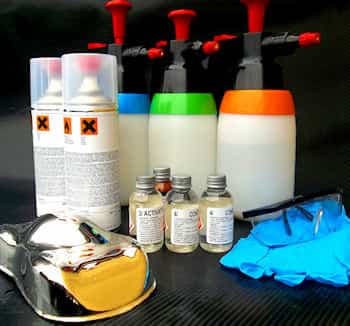
Then, depending on the bike painting effect that you have chosen to undertake, you just have to follow the steps to the letter! It is possible to repaint your bike with a spray gun, as well as with a spray gun. The important thing is application, patience and care.
Tip 1: try to do all the steps, from the base to the varnish, in a single work session, all the steps one after the other, because this will allow the optimal cohesion and the adhesion of the layers between them.
Tip 2: Do not favor hard varnishes! They are more brittle and more sensitive to shocks! Did you know that flexible varnishes are the most suitable for bicycle paints?
Paint your bike chrome
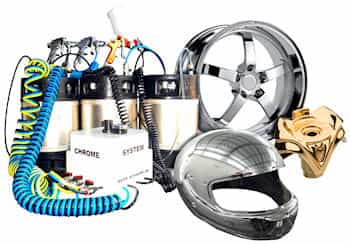
The chrome effect paint is an atypical paint: it is liquid like water, and it gives a real chrome effect!
This is perfectly achievable for a person who has never painted.
With a pistol, we will have the best results, while with an aerosol, it will be a little more sporty. An important thing: it is not possible to varnish with an aerosol, unless the chrome paint is allowed to dry for a very long time. We can note that the chrome paint has a certain resistance, and that if you treat your bike well, then it is not so important to varnish!
Four important things to remember to achieve the chrome effect on a bike:
- It is the undercoat lacquer, which is the essential step to achieve a beautiful mirror. Remember it should be as hard and shiny as possible. To do this, allow deep drying for 14 days.
- Chromium is applied in very light layers, consumption is very low
- Varnishing: Be careful, if you do not take into account the particular technique of applying the varnish, all the beautiful chrome effect will disappear!
- Requirements: 250 ml of base (2C black lacquer), 250 ml of chrome, 250 ml of varnish
Technical: see product pages.
Bike chrome paint video:
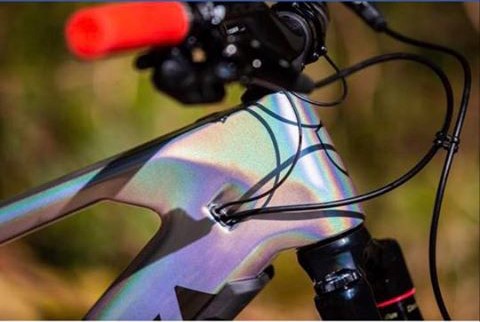
Apply bike paint with a prismatic rainbow effect
The real name of this painting is prismatic painting. However, this painting is most often found under the name Holographic or Spectrum.
This is one of the most impressive effects: it reacts strongly to sunlight, reflecting all the colors of a rainbow and sparkling. There are variants with larger or finer pigments, giving either a glittery or “liquid” effect.
Note that this paint is half transparent, and that it will therefore allow you to use an authentic combination, with the background color of your choice, for example: black, red, green, aluminum.
In general, the darker the background and closer to black, the stronger the effect.
The holographic paint is completely insensitive to UVs, so you can be without fear about the longevity of this paint, which by the way, is not given …
The level of difficulty: it goes from medium to high, depending on the size of the pigments.
Indeed, the finest rainbow paints, bring some constraints, which make the application delicate.
Three-layer system:
Requirements for a bicycle frame and fork: base 250ml, Holographic 250ml, varnish 250ml
Holographic painting video:
Apply chameleon bike paint
Here is the star of special paints: Chameleon bike paint. Old-fashioned in the automotive world, they are ultra-trendy in the cycling world! Some major brands are now even producing bicycles painted in chameleon…
This effect, which changes appearance depending on the point of view from which it is observed, has multiple advantages and qualities:
Above all, it is very beautiful: the colors are bright, pearly and intense, and their ability to change color is intriguing and eye-catching.
Then there is the choice of colors: there are up to 35 chameleons, with 2, 3, 4 or even 6 color changes!
Super easy to paint! Indeed, it is one of the effects with which we can say that it is difficult to miss!
The colors do not contain tints and therefore have maximum UV resistance.
Refer to the instructions on the product pages.
Need for a bicycle frame: black base 250ml, chameleon 250ml, varnish 250ml
Three-layer system
Apply Candy bike paint
The name Candy * refers to confectionery (from English Candy), colored and transparent lollipops, because that is exactly what it is: Candy is a transparent, pure, and luminous color.
Candy bike paint is painted in three stages:
1. Black or white base
2. Pure metallic base or pearly (or even glitter)
3. Candy varnish (tinted transparent varnish)
The level of technicality is intermediate.
The color created using this technique is incomparable, bewitching, deep and intense. Why is it one of the most beautiful paintings in existence?
Quite simply because it is a “light color”: imagine the sunlight, it penetrates the varnish of the bike, bounces on the metallic base which serves as a reflector, then comes out colored thanks to the tinted varnish, towards your eye!
Available colors:
Count yourself, that makes almost 350 unique custom shades for your bike, as they are the result of the many combinations, between:
1.the available Candy underlays (14)
2. The candy varnishes (25)
Three-layer system.
Need: 250ml of black / white base, 250ml of BC1 metal base, 250ml of colored varnish.
Phophorescent bike paint
And why not ? We only live once …!
More seriously, this is an effect that exists and is available for bicycle painting.
Is it really effective? Not sure if you drive around town at night. In the forest, on a moonless night … yes! In short, if you want to be visible to motorists, it is better to wear good old reflective strips!
To put it simply, the phosphorescent paint on a bicycle will capture all types of light and quite quickly will accumulate it (in 15 minutes it’s charged, and it will shine for 6 to 12 hours!). The slow, declining release of light is called phosphorescence.
Major disadvantages:
If you want an effective effect, you must apply on a white background. The appearance of the paint is yellowish (by day) so we can admit that if we are looking for aesthetics above all, it is not won. Applications on fluorescent backgrounds or light colors are possible, but this reduces the phosphorescent effect.
The paint does not emit more light than the light of street lamps, so it is likely to fall quickly below the threshold of ambient light. In short: no total darkness, no visibility!
Three-layer system
Need: 250ml white base, 375ml phosphorescent paint, 250ml varnish.
Detailed instructions on the product pages.
Reference: NightGlow spray or in pot










Leave a Reply