All Products are in stock
and shipped from France.
Delivery within 48 hours.
and shipped from France.
Delivery within 48 hours.
Our categories
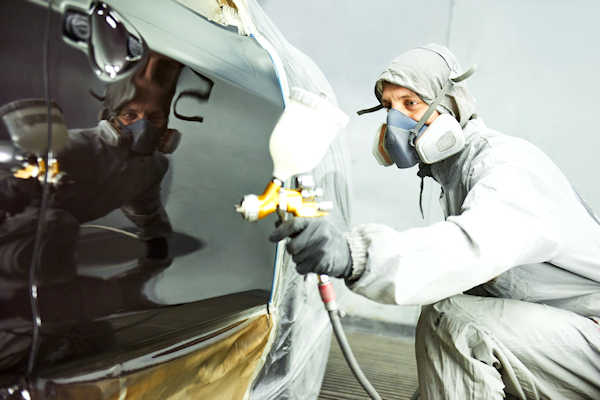 Solutions to eliminate imperfections in the paint
The art of spray painting combines theoretical knowledge of painting techniques with practical knowledge, i.e. experience. This experience is acquired by the painter following his practice, and unfortunately it is by experimenting with all kinds of problems and defects in painting, by understanding them and by solving them, that the painter becomes a seasoned painter.
Strictly following the instructions given by the technical sheets helps to avoid failures. However, for all kinds of small reasons, factors external to the application, very varied defects can appear, which range from reaction to visual defect. These paint defects can be caused by incompatibilities, atmospheric or hygrometric factors, temperatures, application errors, drying times... The list is extremely long and this reflects the extent of the difficulty of the work of automotive painter.
There are a number of "defect guides" in the world of industrial and automotive paint, which list most of the problems that can be encountered, with illustrations, causes and suggested solutions to correct the failure. Each major car paint brand publishes its dictionary of paint defects.
Practicing spray painting is much more complex and different than the theories and technical instructions that one may know before embarking on the application. Solvent-based or Hydro car painting is a complex area of knowledge, theoretical and practical, which is full of pitfalls for the amateur painter.
Among all painting practices, whether architectural, decorative, artistic, automotive painting is undoubtedly the most complex.
How to fix paint defects ?
When you master the application of a product, it is often because you know the product in question, its application surface and its environment particularly well. It's kind of a quiet routine that takes care to avoid all the hidden pitfalls on the way and the steps of the application.
When painting a new surface, both in terms of the type of material and the quantity of surface, but also when using a new product or when painting in an atmosphere in which one does not are not used to painting (temperature, humidity, light, air circulation...), you can have unpleasant surprises, with for example the appearance of small holes, openings, small bubbles, blisters, drips...
Before thinking about providing a solution to your work, you must determine what is the cause of this defect that appeared on the paint. It is in fact useless to renew an application under the same conditions, without having understood what caused the fault. Sometimes the paint defect is difficult to solve and its cause can remain unexplained. It is often advisable to proceed by elimination.
Many amateur applicators immediately put the blame on the product, without having further investigated their own method of application. Above all, it is necessary to repeat all the steps carried out, visualizing its application and studying the application recommendations a second time. It is then necessary to check the mixture, the quality of the preparation of the support and the compatibility of the products.
For all types of problems and defects encountered with the paints, you can contact Stardust Technical Service (tech@Stardustcolors.com) who will probably be able to help you.
Sometimes the cause of the fault cannot be found. In such a case, it is possible to carry out an application test on a small wafer, by scrupulously following the technical data sheet. Sometimes, with a new mixture, a well-prepared surface, an application with the right distance, the right speed, the right temperature, by magic or by logic, we obtain a perfect result.
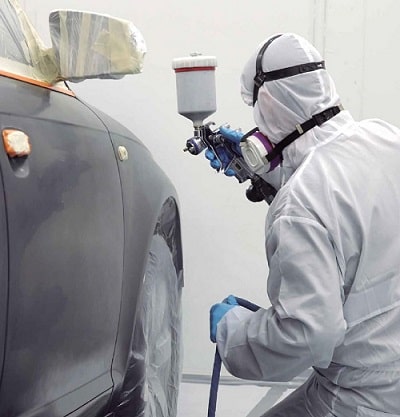 The painter's experience
It is always very important to reflect and understand the origin of the problems that one encounters in the world of spray painting. For those who are passionate and interested in their art, it is always an opportunity to increase their knowledge, their technicality and to gain in efficiency.
When you don't take the time to paint properly or think things through before embarking on a project, you run the risk of failing at any stage of the painting process. And in the world of body painting, the steps from primer to varnish are often numerous, but also costly in terms of working time and products.
One of the tips that cannot be repeated enough is to take the time to do your job as well as possible, especially during the preparation stage. In addition, working without haste and with careful equipment, with clean, purified and filtered air, allows you to avoid all the pitfalls of technical paints.
All experienced painters have earned their stripes after a lot of perseverance and hard work : it can be paints that blister, run, peel, wrinkle... and in most cases, the lessons have been dearly acquired, with many hours of work to redo...
Example of the main defects encountered in solvent-based bodywork paints
Micro bubbling is regularly reported by inexperienced painters and even some painters with years of experience. This is a very annoying flaw that is important to understand.
It represents well the things that should not be done in order to avoid big problems. Basically, gaining a little time to lose a lot more afterwards.
This phenomenon is a rise of solvents which take on the appearance of micro bubbles. This reaction is treacherous and it only appears at certain times, generally at the end of the work, when the varnish is applied. These solvent bubbles rise from the lower layers and it is the solvent-based clearcoat that makes them react. These are often solvents trapped in the primer or paint, due to coats applied too quickly, without a minimum interval time being respected. This trapping of solvents in the lower layers often occurs also at high temperatures: the upper layer dries and closes quickly, while the solvents remain locked inside the paint.
This represents the analysis of the causes of the defect. After that, it is of course necessary to find the best solution for resolving the fault. There are always several options, but in the case of micro bubbles, this can usually be solved with a light sanding of the varnish in which the bubbles are located, then applying a new coat or 2 of clearcoat.
Delamination and problems with paint holding well
We often hear of amateur applicators reporting complaints about paint not holding up. For its uninformed users, the conclusion is quickly made on the guilt of the painting. If a paint does not stick and peels off, then it is poor quality paint!
Often, the technical data sheet has not been studied and the recommendations on the label are not respected.
Only adhesion primers or special paints can guarantee adhesion to a support. And each medium must be treated in a different way. In general, for body paints, there is no adhesion on raw materials such as plastic, metal, etc...
But here is a rule that is largely ignored, even by the most seasoned professionals : a paint cannot guarantee adhesion if it is not applied to a support (often a primer or an old varnish ) that is not properly sanded. Often it is thought that you can do a very fine sanding, so that the paintwork looks better. We often see professionals or individuals sanding with 800 or even 1200 grit sandpaper, superbly ignoring the technical instructions. In the field of grip, paints and even bodywork clearcoats, sanding must be done with 500 grit and nothing else. It is therefore mainly the preparation of the substrate and compliance with the technical recommendations that guarantees good hold.
Of course, there are many other types of peeling, for special cases and special paints. As always, it is important to fully understand the origin and causes of detachment, in order to improve in your profession and your art.


