


 What solutions are available for clearcoat defects and "orange peel"?
In many painting industries, such as industrial coatings, packaging, lacquering, or automotive bodywork, the final step usually involves covering and clear-coating a painted surface with a topcoat.
The clearcoat is a transparent, glossy layer that protects and enhances the paintwork, creating a smooth and shiny appearance. This is where various defects can occur, the most well-known being "orange peel." This term refers to a surface defect caused by poor application technique, improper drying, or unsuitable application conditions.
In this article we provide :
► tips to prevent orange peel formation
► a tutorial on how to correct orange peel defects
► a guide to preventing and correcting five other common clearcoat defects
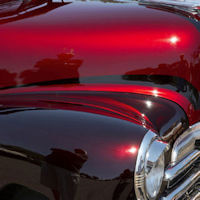
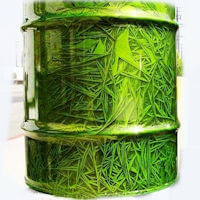
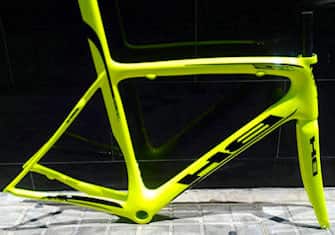
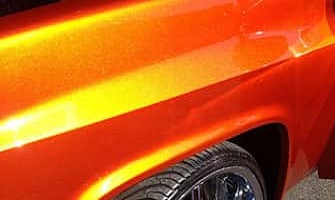
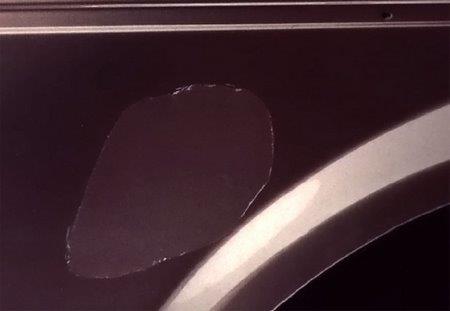
Orange peel in a clearcoat appears as a wrinkled, rough, or uneven surface. For a perfect gloss, the clearcoat should be perfectly smooth. If the underlying colour is dark, it should reflect like a mirror. Conversely, when surface defects are present, gloss is reduced, and the irregularities are visible from both close and far distances, significantly diminishing the finish.
In automotive bodywork, the clearcoating step is one of the most crucial, as it finalises all prior processes, following a perfectly sanded primer and an ultra-smooth matte basecoat. The clearcoat also enhances the brilliance of pearl and metallic particles in the paint beneath.
Applying clearcoat is always a delicate task, unlike priming and painting, which are considered much easier by most painters. The secret to a flawless clearcoat lies in a combination of parameters and strict rules—if not followed, various defects may appear, ruining all the effort invested in the previous stages.
We invite you to read our tutorial on « how to apply an automotive clearcoat correctly ».
Advice to avoid orange peel and clearcoat defects?
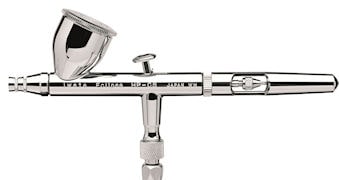
1 ► Properly Adjust the Spray Gun :
For a clearcoat to achieve high gloss, it must be applied in a sufficiently thick layer in one go.
Use a nozzle size between 1.3–1.5 mm.
Open the spray fan to the maximum "flat jet" setting.
Set the air pressure to 3 bars.
The trigger must be fully pressed with no restriction in its movement.
2 ► Mixing the clearcoat
If the clearcoat is not diluted enough, it will not level out properly. Conversely, if over-diluted, it may run and lose gloss.
Use a hardener that matches the ambient application temperature.
Only add the necessary amount of thinner.
Use the clearcoat within 5 to 30 minutes after mixing.
3 ► Ambient temperature
One common cause of orange peel is excessively high ambient temperature.
Always paint in a dry, non-humid environment.
Maintain an ambient temperature between 15–25°C.
It is possible to paint in very cold or very hot conditions by using a slow or fast hardener and thinner.
4 ► Application
This is the final parameter to control in order to avoid orange peel. It concerns the technique used with the spray gun. Very often, the orange peel phenomenon results in a lack of gloss and creates a grainy surface, caused by applying a coat of clearcoat that is too thin.
Adjust the left-to-right movement speed: if it's too fast, the amount of clearcoat applied will be insufficient.
Adjust the distance between the spray gun and the surface: if the spray gun is too far away (more than 15 cm), the clearcoat may partially evaporate before reaching the surface, leading to insufficient thickness.
Fully depress the spray gun trigger: avoid applying thin coats during clearcoating.
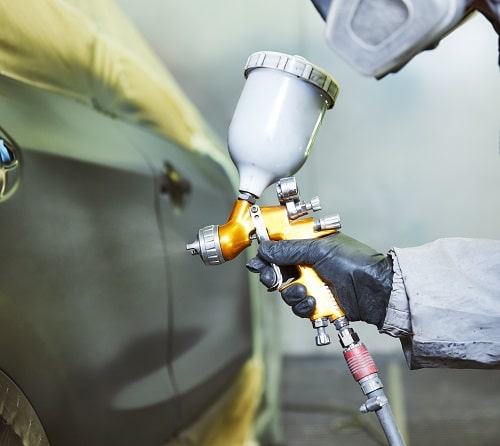
Proper and optimal application of the clearcoat starts with correctly setting up the spray gun. This requires sufficient airflow and a fully open spray pattern, especially when painting large surfaces like cars or motorcycles.
Secondly, the mixing process is crucial. As with any task in automotive refinishing, careful and meticulous work is essential to prevent various issues that can be challenging to resolve. The mixture should be prepared accurately and allowed to rest for 5 minutes to initiate polymerization. However, this mixture should not be used beyond its "pot life".
Dilution is another important aspect. Firstly, never overuse thinner in the clearcoat. Excessive thinner can not only cause runs but also reduce gloss, as too many solvents will need to evaporate through the clearcoat layer during drying.
The third and probably most crucial point to prevent orange peel issues in clearcoat is to consider the speed of the thinner and hardener, as well as the ambient temperature. Often, orange peel forms during clearcoat drying when the hardener or thinner is too fast and/or the ambient temperature is too high. In such cases, the surface of the clearcoat dries too quickly and wrinkles. It's entirely possible to paint at a summer temperature of 30°C and achieve a clearcoat without orange peel by using a slow hardener and a slow thinner.
Finally, our fourth tip, which is also one of the essential points for successful clearcoating: very often, orange peel is simply an application issue. When insufficient clearcoat is applied to the surface in a single coat, often due to fear of runs, the clearcoat doesn't have enough material to level out. To achieve a smooth, glossy surface, a sufficiently thick coat must be applied.
Correcting the "Orange Peel" Phenomenon on Automotive Clearcoat
There are mainly two solutions :
1 ► Sanding and applying a new layer of clearcoat or
2 ► Polishing (suitable for moderate defects)
It's extremely easy to correct the appearance of a clearcoat by reapplying it. This can be done after a few hours for a fast-drying clearcoat or the next day for a standard clearcoat. The process is as follows: first, perform a superficial sanding with a P500 grit sandpaper and some water.
Sanding will smooth out the irregular surface of the clearcoat. Wet sanding allows for a gentler action and reduces clogging of the sandpaper.
No, you shouldn't use finer sandpapers, as many professional painters or amateur applicators do. To ensure perfect adhesion of the clearcoat on the clearcoat, simply follow the manufacturer's technical data sheet recommendations: beyond P500, you're typically outside the recommended guidelines, even if, in practice, a clearcoat appears to adhere correctly on a surface sanded with P800 or P1000.
Correcting Orange Peel Through Polishing
This is often the preferred technique of applicators, even though it often involves as much work, if not more, than applying a new layer of clearcoat.
Polishing will be more or less easy depending on the severity of the orange peel.
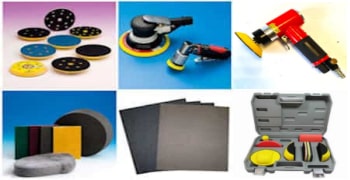
Start by reducing the surface irregularities with a P1500 grit sanding disc, then P2000 and P3000. Then, restore the gloss "artificially" by polishing with a wool pad, followed by a very fine black foam pad.
Polishing is a good option when you don't want to bring the vehicle back into the paint booth and the defect area is reasonably small.
How to Avoid Various Automotive Clearcoat Defects
>Below are the 5 most common automotive clearcoat defects, with advice on how to prevent them and corrective techniques for each case.
1 ► Loss of gloss
2 ► Micro-bubbling
3 ► Cratering or silicone contamination
4 ► Peeling
5 ► Runs and sags
Clearcoating is the most challenging exercise; it's the most delicate final touch that crowns all the previous painting efforts. How to achieve maximum gloss, and especially how to maintain the gloss of an automotive clearcoat, which can often develop defects right after application or during the drying period.
First of all, there are traditional automotive clearcoats with long drying times, for which baking is recommended, and "air-drying" clearcoats that dry quickly and are used for small surfaces.
During the solvent evaporation (flash-off) period, then the "touch-dry" stage (surface hardening), and finally the full curing stage, the perfect gloss of the clearcoat layer can deteriorate, with the appearance of common defects such as runs, micro-bubbling, or dulling (loss of gloss).
1 - Loss of gloss, or “Dulling” of the clearcoat
Symptom: Upon application, the clearcoat is perfectly glossy, but as it dries, the gloss diminishes, resulting in a satin and uneven surface.
Common causes
♦ The hardener is compromised because it's too old, has been overly exposed to air, or has been stored in a place that's too warm for an extended period.
♦ The application and drying temperature is too high. It's important to let the clearcoat dry at ambient temperature (20-25°C). When the surface film of the wet clearcoat dries too quickly, it traps solvents within the clearcoat. Similarly, when baking is done without waiting about ten minutes for solvent evaporation, this type of defect can occur.
♦ Excess thinner: it's important to add the minimal necessary amount of thinner to the clearcoat mixture. While thinner allows for a perfectly smooth and glossy surface upon application, an excess can affect the gloss of the clearcoat resin during drying.
♣ Corrective measures: Simply perform a light sanding and then reapply the clearcoat correctly.
2 – Micro bubbling
Symptom: Micro-bubbling appears a few minutes after clearcoating, manifesting as numerous microscopic dots within the clearcoat layer. These are tiny solvent bubbles.
How to avoid orange peel and clearcoat defects? Applying an Automotive Clearcoat Without Defects
Micro-bubbling occurs when solvents become trapped within the layers of paint or clearcoat, due to applying successive coats too quickly and/or excessively high ambient temperatures. Anyone who has experienced this defect even once usually takes technical data sheet instructions much more seriously afterward... Because the result of saving a few minutes is having to sand everything down again and redo the entire job.
Common causes :
♦ Too many coats of primer or paint have been applied. It's recommended to apply only the necessary amount and avoid excessive thickness.
♦ The waiting time between coats wasn't respected. Layers were applied too quickly on top of each other.
♦ Paints and other primers were applied in an environment that's too warm: the surface layer sealed off without allowing the solvent to escape.
♣ Corrective measures: To correct this type of defect in a clearcoat, simply sand with P500 grit sandpaper, at least down to the depth of the bubbles. Then, apply new coats of clearcoat. Generally, this is sufficient to completely eliminate the micro-bubble defect.
3 - Cratering or Silicone Contamination
Symptom: This common defect can occur during the application of an automotive clearcoat. It manifests as holes up to 3 mm in size, exposing the underlying paint. These are craters in the clearcoat: it fails to properly wet the surface and spread evenly. This indicates a surface tension defect or incompatibility, most often due to invisible contamination, notably the presence of silicone particles.
♣ Corrective measures: To correct this defect, first perform a superficial sanding with P500 grit sandpaper. Before reapplying the clearcoat, ensure that the spray gun or clearcoat used isn't contaminated.
It's not necessary to sand off the clearcoat completely. It's perfectly acceptable to leave the craters and sand the clearcoat to half or three-quarters of its thickness.
Then, apply two new coats of clearcoat. It's important to start with one or two very thin and/or more diluted tack coats to ensure that cratering doesn't recur. Only after 10 minutes can a new thick and glossy coat of clearcoat be applied.
4 – Peeling
Symptom: This defect primarily occurs with fully dried and cured clearcoats. It's commonly seen on older vehicles, where entire sections of clearcoat separate from the base paint and peel off in sheets.
The cause of this defect is clearly identified, because it is an adhesion defect, due to incorrect application, and which can occur in the following two cases:
♦ The clearcoat was applied over dry paint that wasn't sanded, or was sanded too finely: it's imperative to sand the paint with the grit recommended by the clearcoat's technical data sheet. Generally, sanding finer than P500 doesn't guarantee good adhesion.
♦ The clearcoat was applied "wet-on-wet," but the waiting time wasn't respected, or an overly warm temperature caused the base paint to dry faster than expected: the paint's surface sealed off, and the clearcoat couldn't adhere properly.
♣ Corrective measures: Use compressed air to blow off all areas where the clearcoat isn't adhering properly. Then, sand the clearcoat with P500 grit paper or a gray abrasive pad, and apply two coats of clearcoat.
5 – Runs and Sags
This is a common defect that can occur after applying a clearcoat, affecting both amateur and experienced painters.
Here are the different causes of clearcoat runs:
♦ Application and drying temperature is too low: the clearcoat's curing is slowed, and gravity causes it to run.
♦ An irregular and excessive amount of clearcoat was applied in the area where runs occurred.
♦ The hardener isn't suited to the ambient temperature. The clearcoat takes too long to cure.
When possible, it's advisable to clearcoat parts laid flat rather than vertically, which greatly facilitates the process and reduces the risk of runs.
♣ Corrective measures: Generally, it's difficult to touch up a specific area of clearcoat. It's better to reapply clearcoat to the entire piece. To do this, perform a superficial sanding to create adhesion across the entire piece.
For the area with the run, allow it to cure fully, which may take several days for a run that's several millimeters thick. Then, use a small sanding block or an eraser with a piece of P320 grit sandpaper. Carefully and evenly sand with water to level the run. If a flat sanding block isn't used, the sanding won't focus on the peak of the run, and there's a risk of sanding through the surrounding clearcoat layer.
General Tips for Achieving a Beautiful Automotive Clearcoat
This example demonstrates that patience and meticulous attention to each preparatory step, along with strict adherence to application guidelines, ensure a successful outcome. Achieving a beautiful, glossy clearcoat in 20 minutes on a vehicle is just the visible tip of the iceberg (10%), with 90% of the work involving impeccable preparation in the underlying layers, cleaning the spray gun, and ensuring the air filter is in good condition.
Additionally, mastering the perfect technique is naturally essential for applying a flawless automotive clearcoat: adjusting air pressure, proper dilution, selecting the right spray gun settings, maintaining optimal application distance, and ensuring even spray patterns.
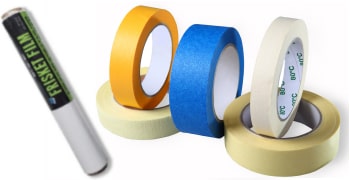
How to properly prepare the support?
Carefully clean the surface before clearcoating (dust, grease, silicone, humidity, sanding residue)
Use a tack cloth to remove any remaining dust.
Avoid touching the cleaned surface.
Ensure the undercoat is fully dry (solvent evaporation, water-based basecoat drying).
Make sure the surface is not too hot.
Make sure that all traces of degreaser are removed.
Ensure that the surface before painting is completely dry.
Perform sufficient sanding with correct grit.
Under what conditions should the clearcoat be applied?
Maintain a proper spray booth temperature (15–25°C).
Ensure an adequate airflow in the spray booth.
Spray in low humidity conditions.
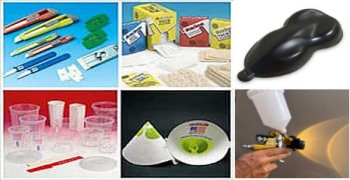
Our product advice.
Ensure compatibility with the undercoats.
Use the correct hardener and thinner for the clearcoat.
Use the minimum dosage of thinner.
Mix to the proper viscosity for smooth application.
Use the hardener and thinner corresponding to the temperature.
What equipment to use and how?
Eliminate moisture from air hoses and compressors.
Purge the air compressor and pressure regulator regularly.
Adjust your spray gun correctly (air pressure and jet width).
Use a thoroughly cleaned and dry spray gun.
Keep a steady hand motion at the correct distance and speed.
How to dry the clearcoat?
Respect the correct flash-off time between coats.
Do not exceed the recommended curing temperature or duration.
Ensure proper drying before delivering the vehicle.